Tuesday, April 3, 2012

How to make Quality Chocolates

There are many ways to make chocolates with minimal effort.  However, making quality chocolate will require a little more work.  To make chocolate the easy way, simply melt baking chocolate, stir in a little natural shortening, mix with nuts and then drop spoonfuls on wax paper.  This way of making chocolate is entirely acceptable, but the problem you'll find is the chocolates do not keep well.  Adding shortening softens the chocolate, but the chocolates will melt easily when left out of the refrigerator.  Furthermore, chocolates left out for a day or two will develop a gritty texture.  So, if you've tried this method and are ready for the next step, you may be in for a little more work.  However, the extra effort is well worth it.

Choosing The Right Type of Chocolate

Toddler holding Chocolate
The First Step will be choosing the right type of chocolate.  Chocolates made with baking chocolate, chocolate chips, and chocolate bars will end up with a bad texture if left at room temperature.  When making high quality chocolates, you must find chocolate that is called "Couverture" chocolate.  This is usually sold in big blocks or little medallions.  Although, couverture chocolate rarely has artificial ingredients, some included artificial vanilla.  So be sure to check the ingredients or the manufacture website before purchasing.

Where to Find Couverture Chocolate

Couverture Chocolate Bricks
If you usually buy chocolate in a grocery store, you may find it a little more difficult to find couverture.  There are plenty of options to choose from when looking on-line; however, it may not always be the right time of year to ship chocolate.  Some distributors will only ship in times of the year when it is cool enough and some will charge you extra to pack the chocolate with special cold packs.  A good price for couverture chocolate is anywhere from $10 to $12 a pound.  Paying for shipping and packing materials will make it much more pricy.   Overall, the best way to get couverture chocolate is to find a local specialty store that sells it.   I googled gourmet stores, chocolate shops, and confectionery shops.  Most of these places will only sell prepared chocolates, but don't be afraid to ask around.  I called a local chocolate shop and the owner gave me the name and address of a nearby coffee shop that also sold candy and couverture chocolate.

How to Make Chocolate with Couverture

Once you find your couverture chocolate, it is time to start making chocolates.  When making the easy chocolates, all you had to do is melt it and you were pretty much done.  However, with couverture, you will need to temper the chocolate.  This process can be a little tricky, but not impossible.  I had good results after my second attempt.  I recommend reading several different guides to tempering chocolate before trying it.

Tempering Chocolate

  1. Use a double boiler or a mettle bowl over a pan of water.  
  2. Chop one half pound of chocolate.  Set aside one third of the chopped chocolate and put the other two thirds in the double boiler or metal bowl.
  3. Slowly heat the chocolate.  I heat it on medium-low or (the 4 setting).  Stir chocolate as it begins to melt.  There are exact temperatures you can use for when to remove the chocolate; however, you can tell that the temperature has been reached once the majority of the chocolate in the pan has melted.  
  4. Remove the pan and set it on top of a paper towel to dry the bottom.  It is important never to let water get in the chocolate.  Water or steam can cause the chocolate to clump.  So it is also best to get the chocolate away from the stove as in case the water in the double boiler has come to a boil.  
  5. Stir in the remainder of the chocolate and continue stirring with a spatula until it is all melted.  
  6. Continue string until the mixture is shiny.  This is the hard part since you will need to continue stirring for 15 minutes.  The first time I tried tempering chocolate, I thought I was done stirring the chocolate after 5 minutes.  However, this was not sufficient and the chocolate ended up with a gritty texture.  Your arm may feel like its going to fall off, but it is important to keep stirring for at least 15 minutes.  The chocolate also needs to cool to a point where it does not appear easy to pour.
  7. Once your chocolate gets to this point, you should slowly reheat the chocolate so that it can be poured into molds.  The best way to do this is by placing it on the double boiler on low (setting 3 or 4) and stir every few minutes.  
  8. At this point, your chocolate will be ready to pour into molds.  Once the molds are ready, refrigerate or freeze them until they are firm (approximately 5 minutes).  Then turn the molds out and wrap the individual chocolates in wrapping foil.
  9. Testing your tempering.  I like to test how I have done with tempering by leaving a few pieces of chocolate out of the refrigerator.  I take a bite the first day, second day, and third day to see how the texture is.  If you tempering was a success, the chocolate should still have a smooth texture on the third day.  If it was not tempered well, then the texture will be gritty.

Wednesday, February 22, 2012

Homemade Cotton Candy

Homemade Cotton Candy
Making cotton candy is a great way to use up all of your left over candy.  Since I started making my own hard candy, I have accumulated about five pounds of what I like to call "ugly candy."  This is a collection of broken sucker pieces, broken glass candy, and hard candies that have melted into a clump.  This candy may be too ugly or awkward to give to the kids, but its wonderful once its turned into cotton candy.  I cannot speak for other brands, but the Nostalgia Cotton Candy Maker works great.   I made a point to watch a couple of instructional videos on youtube before getting started and it is surprisingly easy.   Once it has warmed up, you stick the hard candy in, and then turn it back on and start spinning.   I made watermelon cotton candy for my first batch, and I look forward to making a variety of other flavors from my stash of ugly candy.


Sunday, February 12, 2012

Homemade Pink Chocolate Roses

Valentines Day is right around the corner. So here is the perfect treat for the one you love.

Pink Chocolate Roses

Supplies:
  • Rose Molds (for chocolate or hard candy)
  • Double Boiler (preferred but optional)
  • Wrapping Foil (Red or Pink)
  • Lollipop Sticks (choose the size that fits best with your molds)
Ingredients:
  • 2 Ghirardelli White Chocolate bars (all natural)
  • 1 Tbsp. natural shortening
  • 1/2 tsp. Natural red food coloring
  • 1/8 tsp. Peppermint oil (optional flavoring)

Instructions:

Coarsely chop the white chocolate and add it to your double boiler. Note: chocolate can be melted in a regular pan but it must be tended closely to assure it does not burn. Melt chocolate over medium heat and stir until it is smooth. Monitor the double burner to assure the water does not boil. If the water comes to a boil, remove the pan and lower the heat. Replace the pan only when the steam has dissipated since steam will make the chocolate clump. When the chocolate has melted and is smooth, stir in the food coloring. Note: Roses will be red if artificial coloring is used. Stir in the peppermint oil.
Once the chocolate is smooth with the color and flavor mixed in, it will be time to pour them in the molds.  Remove chocolate from the heat and fill the molds using a spoon.

Mixing in Food Coloring Note: Molds do not need to be greased for making chocolates. Place the lollipop sticks in the molds and assure they are covered with enough chocolate so the sticks will hold up the roses. Place the molds in the freezer for 5 to 10 minutes or until the bottoms of the roses are cold. Turn the mold over a cutting board or plate and the roses should pop out. If they do not pop out right away, slightly twist the mold or press on the back of the rose. Place the molds back in the freezer if the roses do not pop out easily.

Wrap roses in pink or red foil wrappers and decorate with ribbon around the stems (if you like).  Roses will keep a better texture if refrigerated.

Tuesday, January 10, 2012

Pumpkin Spice Eggnog Gelato

I don't care that this recipe is a little out of season because it is absolutely delicious.  If you love eggnog, I know you will enjoy this as well.

Pumpkin Spice Eggnog Gelato
  • 1 cup heavy cream
  • 2 cups whole milk
  • 3/4 cups sugar
  • 4 egg yolks
  • 1 tsp nutmeg
  • 1 tsp vanilla extract
  • 1 tsp pumpkin pie extract 
Combine the cream, milk and half of the sugar in a medium saucepan over medium high heat.  Stir mixture until the sugar has dissolved and then heat without stirring until the milk begins to raise slightly or bubbles start to appear on the side of the pan. Do not bring to a boil. Remove the pan from the heat and let cool. In order to cool quickly, place the pan in a bowl full of ice water. The mixture will have cooled enough once you can comfortably dip your little finger in the liquid for ten seconds.

While the milk mixture is cooling, blend the egg yolks with the remaining sugar until they are fully integrated.  Blend the cooled milk mixture into the egg yolks little by little until they are fully mixed.  At this point, the mixture is essentially a very rich and heavy eggnog.  Pour the eggnog into a double boiler and heat until it is thick enough to coat the back of a spoon.  Note: If you do not have a double boiler, stir the eggnog constantly over medium to medium high heat until the eggnog thickens.  To avoid curdling of the eggs, never let the eggnog come to a boil.

Finally, stir in the nutmeg and flavor extracts. Let the eggnog chill in the refrigerator . When cool, pour the eggnog in an ice cream machine and run the machine for 20 to 25 minutes or until ready. Empty the gelato into a container, stir and then store in the freezer at least 3 hours.

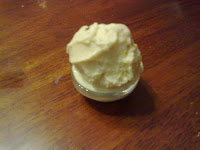
Scoop of Pumpkin Pie Eggnog Gelato
Pumpkin Pie Eggnog Gelato

If the eggnog does not achieve a thick enough texture, the gelato may not freeze well and may melt quickly when removed from the ice cream maker.  In this case, stir the gelato well to integrate the frozen and melted gelato and then store in the freezer.  Stir the gelato several more times in the first three hours of being in the freezer.  This will mix in the melted eggnog and assure a smooth gelato texture throughout the batch.